Feeling stuck in a workout rut? Maybe you’re scrolling through fitness options, wanting something effective you can actually do at home without needing a spaceship’s worth of equipment. You want to feel stronger, maybe tone up a bit, but finding the motivation or the right kind of exercise feels like a chore. If that sounds familiar, you’re in the right place! We’re diving into the world of Resistance Band Pilates Fusion workouts you can do right in your living room. Get ready to learn why mixing stretchy resistance bands with awesome Pilates moves is such a game-changer. By the end of this, you’ll know exactly how to get started and feel excited about a workout that’s fun, challenging, and super convenient.
What’s the Big Deal About Pilates and Resistance Bands Anyway?
Okay, so let’s break it down. Pilates is this cool exercise method that’s all about building strength from your core – think deep belly and back muscles. It focuses on controlled movements, breathing, and really concentrating on how your body moves. Imagine building a super sturdy base for everything else you do. It helps with posture, flexibility, and that overall feeling of being strong and connected.
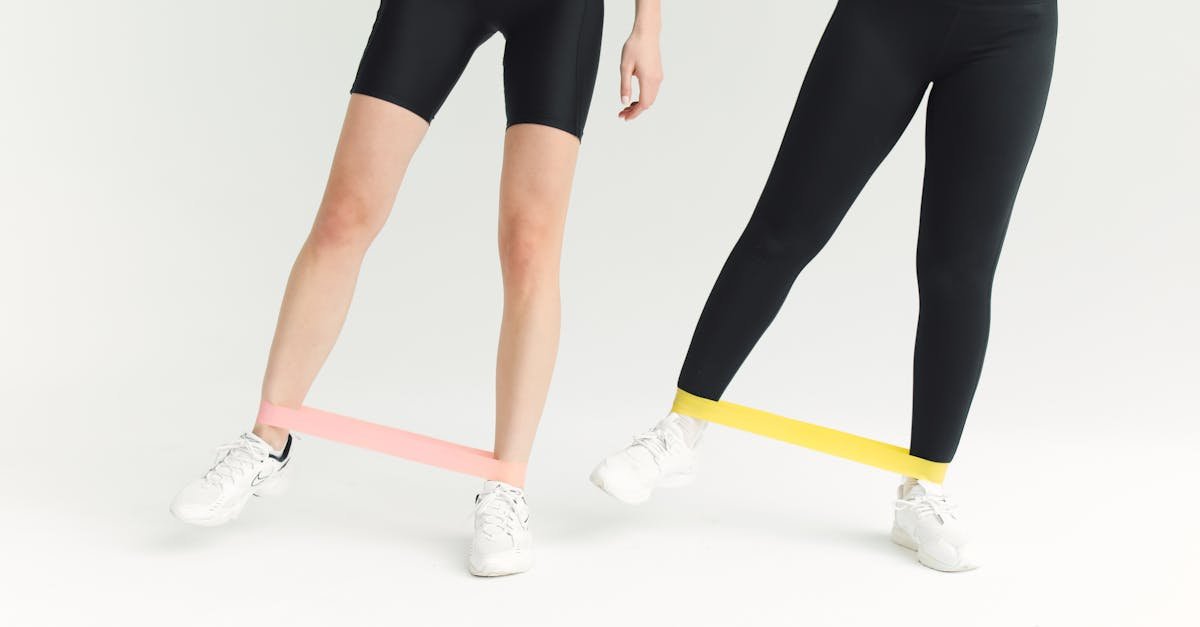
Now, resistance bands? They’re basically super strong, stretchy bands. They come in different strengths, kind of like weights, but they work differently. Instead of just lifting something heavy, the band provides resistance, or challenge, as you stretch it. The cool thing is, it provides resistance through the entire movement, both when you stretch it out and when you slowly bring it back. This makes your muscles work extra hard, especially those smaller stabilizing muscles that sometimes get missed. Plus, they’re cheap, easy to store, and you can take ’em anywhere!
Putting them together – Pilates and resistance bands – is like making your favorite smoothie even better. The controlled movements of Pilates meet the constant challenge of the bands. It amps up the intensity without needing heavy weights or complicated machines. You get that deep core work from Pilates, plus extra muscle toning and strengthening thanks to the bands fighting back against your movements.
Why Fusion Workouts Rock (Especially at Home!)
Mixing different types of exercise, called fusion workouts, is pretty awesome for a few reasons. First off, it keeps things interesting! Doing the same routine over and over can get boring, right? Fusion workouts shake things up, challenging your body in new ways. It’s like getting a 2-for-1 deal – you get the benefits of both types of exercise in one session. Often, this means you can get a great workout in less time.
Doing a Resistance Band Pilates fusion workout at home has some serious perks. It’s super low-impact, meaning it’s generally kind to your joints – no crazy jumping around unless you want to add some later! You also don’t need much space. Got enough room to lie down on a mat? You’re golden. And the equipment? Just your bands and maybe a comfy mat. That’s way cheaper than a gym membership or fancy home equipment!
Think about it: you could be doing moves that strengthen your core, tone your arms and legs, and improve your flexibility, all while chilling in your PJs if you want! It’s great for almost any fitness level too, because you can just use a lighter or heavier band to change how tough it feels. It’s like having adjustable difficulty settings for your body.
Making Pilates Moves Pop with Bands
So, how exactly do resistance bands spice up classic Pilates exercises? Let’s look at a few examples. You know the Pilates ‘Hundred’? It’s that move where you lie on your back, lift your head and feet, and pump your arms like crazy while taking tiny breaths. Now, imagine doing that with a resistance band looped around your thighs or even your feet. Whoa. Suddenly, your legs and core have to work way harder to stay stable against the band’s pull. That pulsing feels ten times more effective!
Or take Leg Circles. Lying on your side or back and circling one leg is great for hip mobility. Add a loop band around your ankles or thighs, though? Now you’re seriously targeting those outer thigh and glute muscles because you have to push against the band with every circle. You’ll definitely feel that gentle burn!
Even a move like the Roll-Up, where you slowly roll your spine up and down off the floor, can get a boost. If you’re finding it tricky, looping a band around your feet and holding the ends can actually give you a little *help* pulling yourself up. But if you’re a pro? You can use the band to add *more* resistance, making your abs work even harder to control the movement. It’s like the band knows just what you need!
Gear Up: Choosing Your Bands
Alright, ready to grab some bands? It’s pretty simple, but here’s the lowdown. You’ll mainly see three types:
Loop Bands: These are like giant rubber bands, forming a closed loop. They’re awesome for putting around your thighs or ankles for leg exercises.
Therapy Bands/Flat Bands: Long, flat strips of latex (or non-latex material). You can tie them into loops, wrap them around feet, or hold the ends. Super versatile.
Tube Bands with Handles: These look more like traditional weights, with handles on the ends of stretchy tubes. Good for mimicking dumbbell exercises like bicep curls or rows.
For Pilates fusion, loop bands and flat bands are usually the most popular. Most importantly, bands come in different resistance levels – usually color-coded, like light, medium, heavy, extra-heavy. It’s smart to start with a lighter set. Why? Because getting the Pilates movements right, with good form and control, is key. You can always move up to a heavier band once you feel stronger. Trust me, trying to wrestle with a band that’s too heavy just leads to wonky form and frustration.
One little tip: don’t just grab the cheapest ones you find. Imagine you’re mid-workout, feeling awesome, and *snap*! Your band breaks. Yikes! My buddy Leo bought a super cheap set once, and the loop band snapped during a glute bridge – luckily it just flew across the room, but it could’ve stung! Investing just a little bit more in decent quality bands means they’ll likely last longer and be safer to use.
Your First Resistance Band Pilates Fusion Moves
Ready to try a few moves? Remember, slow and controlled is the name of the game here. Focus on breathing and feeling the muscles work. Here are a couple to get you started:
Banded Glute Bridge: Lie on your back with knees bent, feet flat on the floor, hip-width apart. Place a loop band around your thighs, just above your knees. Keep tension on the band by gently pressing knees outward. Inhale to prepare, exhale and lift your hips off the floor until your body forms a straight line from shoulders to knees. Squeeze those glutes! Inhale as you slowly lower back down. Feel that extra challenge in your glutes and outer hips?
Banded Side-Lying Leg Lifts: Lie on your side, legs stacked, bottom arm supporting your head. Place a loop band around your ankles (harder) or thighs (a bit easier). Keeping your hips stacked and core tight, lift your top leg straight up against the band’s resistance. Go only as high as you can without rocking your hips back. Slowly lower the leg back down. Do reps on one side, then switch. Hello, outer thighs!
Seated Band Pull-Aparts: Sit tall on the floor or a chair, legs extended or feet flat. Hold a therapy band (or loop band) with both hands, about shoulder-width apart, palms facing down (or up, try both!). Keep a slight bend in your elbows. Squeeze your shoulder blades together as you pull the band apart, stretching it across your chest. Keep your shoulders down, away from your ears. Slowly return to the start. Great for posture and upper back strength!
Start with maybe 10-15 reps of each, focusing on quality over quantity. You can do 2-3 sets.
Staying Safe and Making Progress
Like any workout, safety first! Always take a few minutes to warm up before you start – maybe some gentle marching, arm circles, or cat-cow stretches to get your body ready. And don’t forget to cool down afterward with some nice, relaxing stretches for the muscles you worked.
The biggest thing? Listen to your body. Pilates with bands should feel challenging, but not painful. If something feels sharp or “wrong,” stop or modify the exercise. Maybe use a lighter band, do fewer reps, or try a slightly different position. It’s not about pushing through pain; it’s about finding what works for *your* body on that particular day. Think of it like tuning an instrument – find the right tension and movement for you.
So how do you get stronger? Once the exercises start feeling easier (and they will!), you can make things tougher. Grab that heavier resistance band, try doing more repetitions or an extra set, or look up slightly more advanced variations of the exercises. The key is consistency. Aiming for even 2-3 sessions a week can make a huge difference over time. Keep showing up for yourself, and you’ll definitely see and feel the progress!
So, there you have it! Resistance band Pilates fusion is a fantastic way to shake up your routine right from your own home. We’ve talked about how combining the core-strengthening, controlled movements of Pilates with the versatile challenge of resistance bands creates a powerful workout. It’s low-impact, doesn’t require much space or fancy gear, and is totally adaptable to your fitness level. You learned how bands can make classic moves more intense and got some simple exercises to try out.
The main takeaway? This workout style can help you build strength, improve muscle tone and flexibility, and boost your overall body awareness, all without needing a gym. Give it a whirl! Experiment with the moves, find the band resistance that feels right, and focus on moving with control. It might just be the fun, effective home workout you’ve been looking for. You’ve totally got this!